Step 2 — Configure the Default Policy
The default policy is the row labeled "Anything not matched above" at the bottom of the rules list. It applies to both directions — inbound traffic arriving at the staple IP, and outbound traffic leaving it.
Click the default policy row to open its editor.
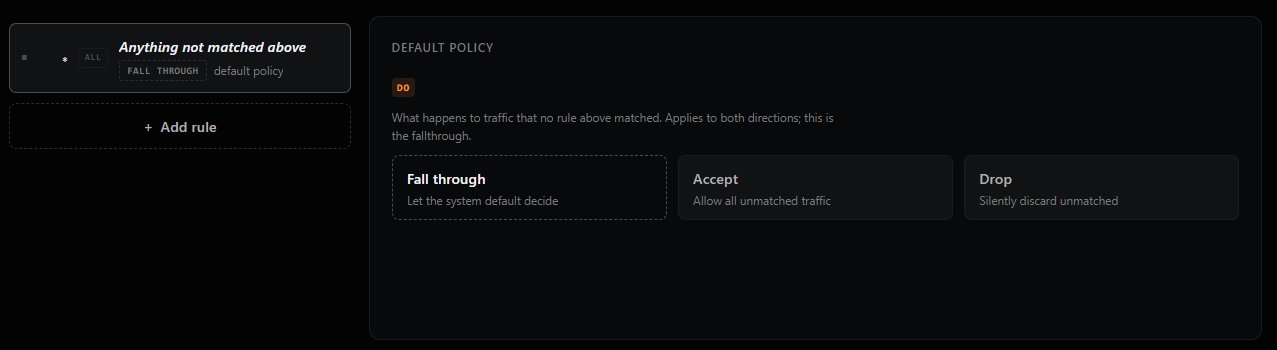
You have three choices:
| Option | Description |
|---|---|
| Fall through | Let the system's built-in default decide. The safest choice when you're getting started — it preserves whatever baseline behavior the platform provides. |
| Accept | Allow all unmatched traffic. Use this when you only want to block specific traffic via rules — every other packet passes through. |
| Drop | Silently discard all unmatched traffic. Use this when you only want to allow specific traffic via rules — every other packet is rejected without a response. This is the most secure posture. |
Two common patterns: - Allow-list (recommended for security-sensitive services): Set default to Drop, then add
Acceptrules for the specific traffic you want to permit. - Block-list: Set default to Accept, then addDroprules for traffic you want to reject.⚠️ Be careful when switching to Drop. If you don't have any
Acceptrules in place yet, switching the default to Drop and clicking Apply will block all traffic to your origin. Always add the rules you need before tightening the default.
Previous: ← Step 1 — Open the Firewall Editor Next: Step 3 — Add a New Rule →